Online workshops
On this page, you find workshops, that you can do at home. I show different techniques, that I often use myself, and I show you how you can make variations on the Jacominis kits.
On this page, you find workshops, that you can do at home. I show different techniques, that I often use myself, and I show you how you can make variations on the Jacominis kits.

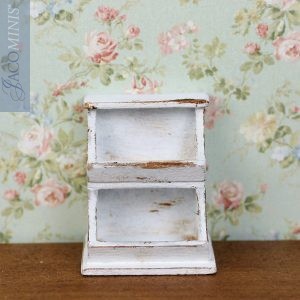
I took the kit CS 11, and I want to give it a vintage look. I use patina to get that vintage effect. First, I paint the bin white, and then I lightly sand it with fine sand paper (180), see photo 1. I use an old pencil for the patina, and a piece of cotton cloth to take an eventual surplus of patina from the pencil (photo 2). Apply some patina with an almost dry pencil on the edges. On the surfaces, you can apply an irregular stroke here and there, always in the direction of the woodgraining, like on photo 3.


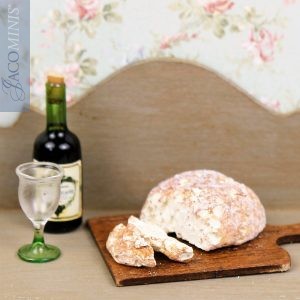
I take the bread boards from the Jacominis Cottage series, CS 17. When you varnish the bread boads with rustic oak varnish, they will be like on photo 1. You have to varnish them twice. I want to make a woodgraining and give the bread boards an authentic and used, vintage look and feel.
I draw lines on the MDF with a needle, see photo 2. Then I lightly sand the boards with very fine paper (320). And then I varnish them with rustic oak varnish again. Let it dry for a while, and then you repeat everything once again. The result will be the bread boards of photo 3.


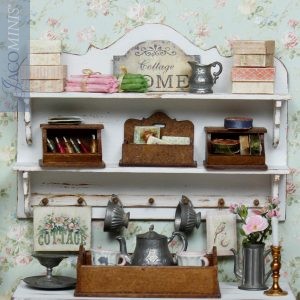
I transformed Jacominis kit CS 01 into a brocante wall rack with extra hooks.
Glue the kit CS 01 together, following the work instructions of the kit. Saw a lath of 5 x 1.5 mm, in the same length as the space between the two shelf supports. Drill holes in the lath, where you want to place the buttons or hooks. I painted the lath in white, and the hooks in brown. Of course, you can choose your own colors. I gave the lath a vintage look with some patina accents. I glued the hooks into the holes. Now, you can glue the lath on to the rack.


How do you make nice and neat piles of linen in your cabinet?
For the small piles, you cut a piece of cloth, preferrably cotton, in strips of 4 x 8 cm. Fold 1 cm in on the long sides, and fix it with glue. You now have a strip of 2 x 8 cm. Fold the strip double, making sure that the fold is visible. Now you fold one side till the fold, and fix it with glue. Your strip is now 2 x 4 cm. Fold the strip in the middle and glue it. Make two of these piles and glue them on each other. Glue a ribbon around it with a knot.
For the large pile, you start with a strip of 7.5 x 10 cm. Fold a strip of 4 x 10 cm, and then you fold like with the small piles.


